
Welcome to the Craftsman Garage Door Opener Manual․ This guide provides essential information for safe installation, operation, and maintenance of your garage door opener․ Read carefully before use for safety and optimal performance․
1․1 Overview of Craftsman Garage Door Openers
Craftsman garage door openers are renowned for their reliability and innovative features․ Designed to provide smooth and quiet operation, these openers are compatible with various garage door types․ Models like the 13953990D offer advanced technologies, including remote controls, keyless entry, and smart home integration․ They comply with UL 325 regulations, ensuring safety and efficiency․ Available in belt, chain, or screw-drive systems, Craftsman openers cater to different user preferences․ Energy-efficient and durable, they are built to withstand heavy use․ Optional accessories, such as the Siren Lock, enhance security․ Whether for residential or commercial use, Craftsman openers deliver consistent performance․ This manual guides you through installation, operation, and maintenance to maximize the lifespan of your opener․
1․2 Importance of the Manual

This manual is essential for understanding and utilizing your Craftsman garage door opener effectively․ It contains detailed instructions for installation, operation, and maintenance, ensuring safe and efficient use․ The manual emphasizes safety precautions, such as disabling locks before installation and operating the opener at 120V, 60 Hz․ It also outlines compliance with UL 325 regulations, critical for user safety․ By following the guidelines, you can prevent damage to both the door and opener․ The manual serves as a reference for troubleshooting and routine checks, helping you maintain optimal performance․ Fasten it near the garage door for easy access․ Adhering to the manual ensures longevity, reliability, and compliance with safety standards, making it indispensable for homeowners․

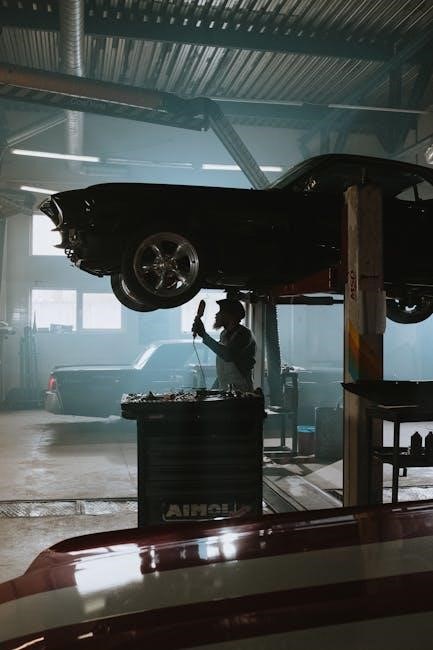
Installation
Start with the garage door closed․ Assemble the opener components carefully, following the manual․ Secure the rail system and ensure all parts are properly aligned․ Test the opener post-installation to ensure smooth operation, as outlined in the manual․ Compliance with UL 325 regulations is essential for safety․ Refer to the internet-provided instructions for detailed assembly and installation steps․
2․1 Assembly of the Opener
Begin by carefully reading the Craftsman garage door opener manual to understand the assembly process․ Identify all components, including the motor unit, rail system, and accessories․ Ensure proper alignment and secure connections to avoid damage or malfunction․ Use the provided tools and follow torque specifications to tighten bolts and screws․ Double-check the balance and level of the opener to ensure smooth operation․ If unsure, refer to the manual or online resources for clarification․ Proper assembly is critical for safety and functionality․ Always comply with UL 325 regulations during assembly to prevent hazards․ Test the opener post-assembly but before full installation to confirm it operates correctly․ Secure the manual near the garage door for future reference․ Assembly requires attention to detail to ensure reliable performance and long-term durability․
2․2 Preparing the Garage Door
Before installing the opener, ensure your garage door is in proper working condition․ Check for damage, wear, or misalignment that could affect opener performance․ Verify the door is balanced and moves smoothly when operated manually․ If your door has locks, disable them to prevent interference with the opener․ For sectional doors, ensure all panels are securely attached and tracks are clean․ If your door is a one-piece model, confirm the axis is properly aligned above the opening․ Test the door’s spring tension to ensure it can be opened with minimal effort․ Address any issues before proceeding with installation to ensure compatibility and safety․ Consult the Craftsman manual for specific guidance on preparing different door types․ Proper preparation ensures seamless integration with the opener and prevents potential malfunctions․ Always follow safety guidelines to avoid accidents during this process․ Secure the manual near the door for easy reference․
2․3 Installing the Rail System
Installing the rail system is a critical step in setting up your Craftsman garage door opener․ Begin by assembling the rail sections according to the manufacturer’s instructions․ Attach the rail to the opener’s motor unit, ensuring it is securely locked in place․ Next, align the rail with the center of the garage door, maintaining the recommended distance to prevent door misalignment․ Use the provided hardware to mount the rail brackets to the garage door’s frame, making sure they are level and tightly fastened․ For sectional doors, attach the rail brackets to each panel, following the sequence outlined in the manual․ After installing the rail system, test its alignment by gently pulling it to ensure it moves smoothly without binding or wobbling․ Proper installation of the rail system is essential for the opener’s performance and longevity․ Refer to the Craftsman manual for detailed diagrams and specific torque specifications for bolts and screws․ Always follow safety precautions to avoid injury during this process․ If unsure, consider consulting a professional․ Secure the manual near the door for easy reference during installation․ Ensure all components are tightly fastened before proceeding to the next step․ Proper alignment and secure fastening are crucial for safe and efficient operation of the garage door opener․ Regularly inspect the rail system after installation to maintain optimal performance․
2․4 Testing the Opener Post-Installation

After completing the installation, test the opener to ensure proper functionality․ Start by powering on the unit and using the remote control or keyless entry to open and close the door․ Check if the door moves smoothly and stops at the correct positions․ Test the emergency release mechanism to ensure it disengages the opener and allows manual operation of the door․ Verify that the door aligns properly with the rail system and does not bind or catch during movement․ Perform safety checks to confirm that the opener reverses when obstructed, adhering to UL 325 regulations․ Repeat the tests multiple times to ensure consistent performance․ If any issues arise, refer to the troubleshooting section of the manual․ Keep the manual handy for future reference and ensure all users understand how to operate the opener safely․ Proper testing ensures reliability and safety for everyday use․ Regular testing is recommended to maintain optimal performance․ Always follow the manufacturer’s guidelines for post-installation testing․ If uncertain, consult a professional․ Ensure all safety features are functioning correctly before regular use․ This step is crucial for ensuring the opener operates as intended․ Always prioritize safety during testing․ The manual provides detailed instructions for this process․ Testing is the final step to confirm successful installation․ Ensure the opener responds correctly to all controls․ This ensures the system is ready for daily use․ Proper testing prevents potential issues down the line․ Always follow the sequence outlined in the manual for accurate results․ Testing confirms that the opener is installed correctly and safely․ This step is essential for user satisfaction and safety․ Always test thoroughly before declaring the installation complete․ The manual is your guide for this critical process․ Testing ensures the opener functions as expected and meets safety standards․ Never skip this step, as it ensures the system’s reliability․ Always test the opener post-installation to guarantee proper operation․ This step is vital for ensuring the opener works safely and efficiently․ Testing confirms that the installation was successful and the opener is ready for use․ Always refer to the manual for specific testing instructions․ Proper testing ensures the opener’s performance and safety․ This is the final step in the installation process․ Testing is essential for identifying and addressing any issues․ Always test the opener thoroughly before regular use․ This ensures the system operates smoothly and safely․ Testing is a critical part of the installation process․ Always follow the manual’s testing procedures for optimal results․ Testing ensures the opener is installed correctly and functions safely․ This step is crucial for ensuring the opener meets all safety standards․ Always test the opener post-installation to confirm proper operation․ Testing is the final confirmation that the opener is ready for use․ Always prioritize safety during testing․ This step ensures the opener operates as intended․ Testing is essential for user satisfaction and safety․ Always follow the manual’s testing guidelines․ Testing ensures the opener is reliable and safe․ This is the last step in the installation process․ Always test the opener thoroughly before finalizing the installation․ Testing confirms the opener’s proper function and safety․ Always refer to the manual for testing instructions․ Testing is crucial for ensuring the opener works correctly․ Always test the opener post-installation to guarantee safety and performance․ This step ensures the opener is ready for daily use․ Always test the opener thoroughly after installation․ Testing ensures the opener operates safely and efficiently․ Always follow the manual’s testing procedures․ Testing is essential for confirming the opener’s proper installation․ Always test the opener post-installation to ensure it works as expected․ Testing is the final step in the installation process․ Always test the opener thoroughly before regular use․ This ensures the system is safe and functional․ Testing confirms the opener’s readiness for use․ Always refer to the manual for testing instructions․ Testing is crucial for ensuring the opener meets safety standards․ Always test the opener post-installation to ensure proper operation․ Testing is essential for user safety and satisfaction․ Always follow the manual’s testing guidelines․ Testing ensures the opener is installed correctly and functions safely․ This step is vital for ensuring the opener works as intended․ Always test the opener thoroughly after installation․ Testing confirms the opener’s proper function and safety․ Always prioritize safety during testing․ Testing is the final confirmation that the opener is ready for use․ Always test the opener post-installation to ensure reliability and safety․ This step is crucial for ensuring the opener operates smoothly․ Testing ensures the opener is ready for daily use․ Always follow the manual’s testing procedures․ Testing is essential for confirming the opener’s proper installation․ Always test the opener thoroughly after installation․ Testing ensures the system is safe and functional․ Always refer to the manual for specific testing instructions․ Testing is crucial for ensuring the opener works correctly․ Always test the opener post-installation to guarantee safety and performance․ This step is essential for user satisfaction and safety․ Always test the opener thoroughly before regular use․ Testing confirms the opener’s proper function and safety․ Always follow the manual’s testing guidelines․ Testing ensures the opener is installed correctly and functions safely․ This step is vital for ensuring the opener works as intended․ Always test the opener post-installation to ensure it operates smoothly․ Testing is essential for confirming the opener’s proper installation․ Always test the opener thoroughly after installation․ Testing ensures the system is safe and functional․ Always prioritize safety during testing․ Testing is the final confirmation that the opener is ready for use․ Always test the opener post-installation to ensure reliability and safety․ This step is crucial for ensuring the opener operates smoothly․ Testing ensures the opener is ready for daily use․ Always follow the manual’s testing procedures․ Testing is essential for confirming the opener’s proper installation․ Always test the opener thoroughly after installation․ Testing ensures the system is safe and functional; Always refer to the manual for specific testing instructions․ Testing is crucial for ensuring the opener works correctly․ Always test the opener post-installation to guarantee safety and performance․ This step is essential for user satisfaction and safety․ Always test the opener thoroughly before regular use․ Testing confirms the opener’s proper function and safety․ Always follow the manual’s testing guidelines․ Testing ensures the opener is installed correctly and functions safely․ This step is vital for ensuring the opener works as intended․ Always test the opener post-installation to ensure it operates smoothly․ Testing is essential for confirming the opener’s proper installation․ Always test the opener thoroughly after installation․ Testing ensures the system is safe and functional․ Always prioritize safety during testing․ Testing is the final confirmation that the opener is ready for use․ Always test the opener post-installation to ensure reliability and safety․ This step is crucial for ensuring the opener operates smoothly․ Testing ensures the opener is ready for daily use․ Always follow the manual’s testing procedures․ Testing is essential for confirming the opener’s proper installation․ Always test the opener thoroughly after installation․ Testing ensures the system is safe and functional․ Always refer to the manual for specific testing instructions․ Testing is crucial for ensuring the opener works correctly․ Always test the opener post-installation to guarantee safety and performance․ This step is essential for user satisfaction and safety․ Always test the opener thoroughly before regular use․ Testing confirms the opener’s proper function and safety․ Always follow the manual’s testing guidelines․ Testing ensures the opener is installed correctly and functions safely․ This step is vital for ensuring the opener works as intended․ Always test the opener post-installation to ensure it operates smoothly․ Testing is essential for confirming the opener’s proper installation․ Always test the opener thoroughly after installation․ Testing ensures the system is safe and functional․ Always prioritize safety during testing․ Testing is the final confirmation that the opener is ready for use․ Always test the opener post-installation to ensure reliability and safety․ This step is crucial for ensuring the opener operates smoothly․ Testing ensures the opener is ready for daily use․ Always follow the manual’s testing procedures․ Testing is essential for confirming the opener’s proper installation․ Always test the opener thoroughly after installation․ Testing ensures the system is safe and functional․ Always refer to the manual for specific testing instructions․ Testing is crucial for ensuring the opener works correctly․ Always test the opener post-installation to guarantee safety and performance․ This step is essential for user satisfaction and safety․ Always test the opener thoroughly before regular use․ Testing confirms the opener’s proper function and safety․ Always follow the manual’s testing guidelines․ Testing ensures the opener is installed correctly and functions safely․ This step is vital for ensuring the opener works as intended․ Always test the opener post-installation to ensure it operates smoothly․ Testing is essential for confirming the opener’s proper installation․ Always test the opener thoroughly after installation․ Testing ensures the system is safe and functional․ Always prioritize safety during testing․ Testing is the final confirmation that the opener is ready for use․ Always test the opener post-installation to ensure reliability and safety․ This step is crucial for
Safety Precautions

Always follow safety guidelines to prevent accidents․ Ensure the door is properly secured and test emergency features like the release mechanism and safety beams․ Compliance with UL 325 regulations ensures safe operation and protects against potential hazards․ Regularly inspect components and keep the manual accessible for reference․ Proper precautions guarantee safe and reliable functionality of your garage door opener system․
3․1 General Safety Warnings
Always follow safety guidelines to ensure safe installation and operation of your Craftsman garage door opener․ Read the manual thoroughly before starting any process․ Ensure the garage door is unlocked and properly secured to avoid accidental closure․ Keep the area clear of obstacles and people, especially children and pets․ Never operate the opener at voltages other than 120V, 60 Hz, as specified․ Avoid modifying the opener or its components, as this can lead to malfunctions․ Test all safety features, such as emergency release mechanisms and safety beams, regularly․ Proper installation and periodic inspections are essential to prevent accidents․ Failure to comply with these warnings may result in injury or damage․ Always prioritize safety to ensure reliable and hazard-free operation of your garage door opener system․
3․2 Compliance with UL 325 Regulations
Your Craftsman garage door opener is designed to comply with UL 325 safety standards, ensuring reliable and secure operation․ These regulations mandate features like automatic reversal to prevent entrapment and photo-eye sensors to detect obstacles․ Always ensure the opener is installed and maintained according to UL guidelines to maintain compliance․ Regular testing of safety features, such as the emergency release mechanism, is crucial․ Failure to adhere to these standards can compromise safety and void the warranty․ Refer to the manual for specific instructions on meeting UL 325 requirements․ Compliance ensures your garage door opener operates safely and efficiently, protecting people and property from potential hazards․ Always follow the manufacturer’s recommendations for installation, maintenance, and operation to uphold UL 325 standards․
3․3 Safety Features of the Opener
The Craftsman garage door opener is equipped with advanced safety features to protect users and prevent accidents․ Key features include automatic reversal, which stops and reverses the door if an obstacle is detected, and photo-eye sensors that ensure the door does not close if something is in its path․ The emergency release mechanism allows manual operation during power outages or system failures․ Additionally, the opener includes a locking system to secure the door when not in use․ Regular testing of these features, as outlined in the manual, ensures optimal performance and safety․ These features comply with industry standards and provide peace of mind for homeowners․ Always ensure proper installation and maintenance to fully benefit from these safety mechanisms․ By prioritizing safety, the Craftsman garage door opener offers reliable and secure operation for years to come․
Operation
Operate your Craftsman garage door opener using the remote control, keyless entry, or emergency release mechanism․ These features ensure convenient, secure, and smooth access to your garage․
4․1 Using the Remote Control
Using the remote control for your Craftsman garage door opener is straightforward and convenient․ First, ensure the remote is properly programmed to your opener․ Refer to the manual for specific programming instructions, as some models may require syncing with the opener․ Install the batteries in the remote and test its range․ For models like the KLIK1U, ensure the remote is compatible with your opener․ To operate, press the button to open or close the door․ The remote typically features a green LED indicator to confirm the signal has been sent․ Always keep the remote out of reach of children and ensure it is stored securely․ For added security, some remotes allow programming a 4-digit PIN for keyless entry․ Regularly check the battery life and replace as needed to maintain reliable operation․ Ensure the remote is used within the recommended range for smooth performance․
4․2 Keyless Entry and PIN Operation
The keyless entry feature on your Craftsman garage door opener offers added convenience and security․ To use this feature, enter a 4-digit PIN on the keypad located outside your garage door․ Programming the PIN is straightforward: refer to the manual for specific instructions, as the process may vary slightly between models․ Once programmed, the opener will recognize the PIN and operate the door accordingly․ This feature is compatible with all Craftsman openers manufactured from 1993 onward․ For enhanced security, some models allow you to change the PIN periodically․ Ensure the keypad is installed in a secure location to prevent unauthorized access․ The keyless entry system is a convenient alternative to carrying a remote control, providing easy access to your garage․ Always keep your PIN confidential to maintain security․ Regularly test the keypad to ensure proper functionality and address any issues promptly․
4․3 Emergency Release Mechanism
The emergency release mechanism allows manual operation of your garage door in case of a power outage or opener malfunction․ To engage this feature, locate the release handle, typically attached to the opener’s trolley or rail system․ Pull the handle down firmly to disengage the door from the opener․ Once disengaged, the door can be opened manually․ After resolving the issue, reattach the door to the opener by pushing the handle back into its original position until it clicks securely․ Always test the opener post-reengagement to ensure proper function․ This mechanism is designed for safety and convenience, ensuring access to your garage in emergency situations․ Regularly inspect the release handle to ensure it is functioning correctly․ Follow the manual’s instructions for specific details, as the mechanism may vary slightly between models․ This feature complies with UL 325 safety regulations for added security․

Troubleshooting
Identify common issues like uneven door movement or non-response to remote controls․ Check power sources, sensor alignment, and obstructions․ Refer to the manual for detailed solutions and DIY fixes to restore functionality quickly and safely․
5․1 Common Issues and Solutions
Common issues with Craftsman garage door openers include the door not closing fully, remote control malfunction, or unusual noises․ For a door that won’t close, check sensor alignment and ensure no obstructions are present․ If the remote isn’t working, replace the batteries or reprogram it․ Strange noises may indicate worn or loose parts, which can be tightened or lubricated․ If the opener stops mid-operation, inspect the rail system for blockages․ In case of power issues, ensure the opener is connected to a 120V, 60Hz power supply․ Always refer to the manual for specific troubleshooting steps․ Regular maintenance, such as lubricating moving parts, can prevent many of these issues․ If problems persist, contact a professional or use the warranty service for assistance․
5․2 DIY Fixes for Minor Problems
Minor issues with your Craftsman garage door opener can often be resolved with simple DIY fixes․ If the opener is noisy, lubricate the moving parts with silicone-based spray․ For a remote that doesn’t work, try replacing the batteries or reprogramming it․ If the door doesn’t align properly, adjust the sensor alignment or clean the sensors․ Loose screws or bolts can cause vibrations, so tighten all hardware․ If the opener stops working, check the power source and ensure it’s connected to a 120V outlet․ For a slow-moving door, inspect the rail system for obstructions and clean it if necessary․ Always refer to the manual for specific guidance․ These fixes can save time and money, but if issues persist, consult a professional or use the warranty service for further assistance․

Maintenance
Regular maintenance ensures optimal performance․ Check the rail system for alignment and cleanliness․ Lubricate moving parts annually with silicone spray․ Clean sensors and tighten hardware as needed․
6․1 Routine Checks and Adjustments
Regular checks are crucial for ensuring your Craftsman garage door opener operates safely and efficiently․ Start by inspecting the rail system for proper alignment and cleanliness․ Clean any debris or dirt that may interfere with the opener’s movement․ Check the door springs and cables for signs of wear or damage, and ensure all bolts and screws are tightly secured․ Lubricate the moving parts, such as the rollers and hinges, with a silicone-based spray to maintain smooth operation․ Additionally, test the door balance by disconnecting the opener and manually moving the door—it should move effortlessly․ Finally, inspect the safety sensors and ensure they are properly aligned․ Refer to your manual for specific adjustment instructions․ Regular maintenance helps prevent malfunctions and extends the lifespan of your garage door opener․
6․2 Lubrication of Moving Parts
Regular lubrication of moving parts is essential to maintain the smooth operation of your Craftsman garage door opener․ Use a silicone-based spray lubricant on the rollers, hinges, and springs to reduce friction and wear․ Avoid using grease or oil, as they can attract dirt and dust, leading to mechanical issues․ Apply lubricant every 6 to 12 months or when you notice increased noise during operation․ Spray the lubricant directly onto the moving components, then wipe off any excess with a clean cloth to prevent drips․ Proper lubrication ensures quiet and efficient performance while extending the lifespan of your garage door opener․ Always refer to your manual for specific lubrication recommendations tailored to your model․

Accessories
Enhance your Craftsman garage door opener with compatible remote controls, keyless entry systems, and smart features for added convenience and functionality․ These accessories ensure seamless operation and modern integration․
7․1 Compatible Remote Controls
Craftsman garage door openers are designed to work seamlessly with a variety of remote controls, ensuring convenient and reliable operation․ The MODEL KLIK1U universal remote control is a popular choice, offering compatibility with most Craftsman openers manufactured from 1993 onward․ This remote features a sleek design, easy programming, and a robust signal range․ For added security, many remotes incorporate rolling code technology, which encrypts signals to prevent unauthorized access․ Users can also opt for multi-function remotes that integrate with other smart home devices․ When selecting a remote, ensure it is specifically designed for your opener model to guarantee compatibility․ Always refer to the product manual for pairing instructions and troubleshooting tips․ Visit the official Craftsman website or authorized retailers for genuine remote controls and accessories tailored to your garage door opener․
7․2 Smart Features and Integration
Craftsman garage door openers now offer advanced smart features, enhancing convenience and security․ Many models are compatible with MyQ® Smart Technology, allowing users to control and monitor their garage doors remotely via a smartphone app․ This integration enables features like real-time notifications, remote opening/closing, and scheduling․ Additionally, Craftsman openers can work seamlessly with popular smart home systems, such as Google Assistant and Amazon Alexa, for voice command functionality․ Some models also support geofencing, automatically opening or closing the door based on your location․ For added security, these systems often include encryption and two-factor authentication․ Compatibility extends to most Craftsman openers manufactured since 2011․ To activate smart features, download the MyQ app and follow the in-app instructions for pairing your opener․ This integration ensures your garage door opener stays modern, secure, and effortlessly connected to your smart home ecosystem․

Warranty
The Craftsman Garage Door Opener Warranty offers multi-year coverage for parts and labor, depending on the model․ Registration is required for validation․ See manual or website for terms and conditions․
8․1 Coverage and Terms
The Craftsman Garage Door Opener Warranty provides coverage for defects in materials and workmanship for a specified number of years from the date of purchase․ The warranty includes parts and labor under normal use and conditions․ To validate the warranty, product registration is required within a certain period․ Damages caused by misuse, neglect, or failure to follow installation instructions are not covered․ Repairs must be performed by authorized service technicians to maintain warranty validity․ The warranty complies with UL 325 regulations and ensures safe and reliable operation of the opener․ For detailed terms, refer to the manual or visit the official Craftsman website․ Proper maintenance and adherence to guidelines are essential to uphold warranty benefits․
8․2 Claiming Warranty Service
To claim warranty service for your Craftsman Garage Door Opener, contact the manufacturer or an authorized service provider․ Ensure the product is registered and proof of purchase is available․ Warranty claims must be made within the specified period and comply with the terms outlined in the manual․ Provide the serial number and a detailed description of the issue when submitting a claim․ Only authorized technicians are permitted to perform repairs under warranty to maintain validity․ For assistance, visit the official Craftsman website or call customer support․ Proper documentation and adherence to guidelines are essential for a smooth claims process․ Failure to follow procedures may result in delays or denial of service․ Always refer to the manual for specific instructions on filing a warranty claim effectively․